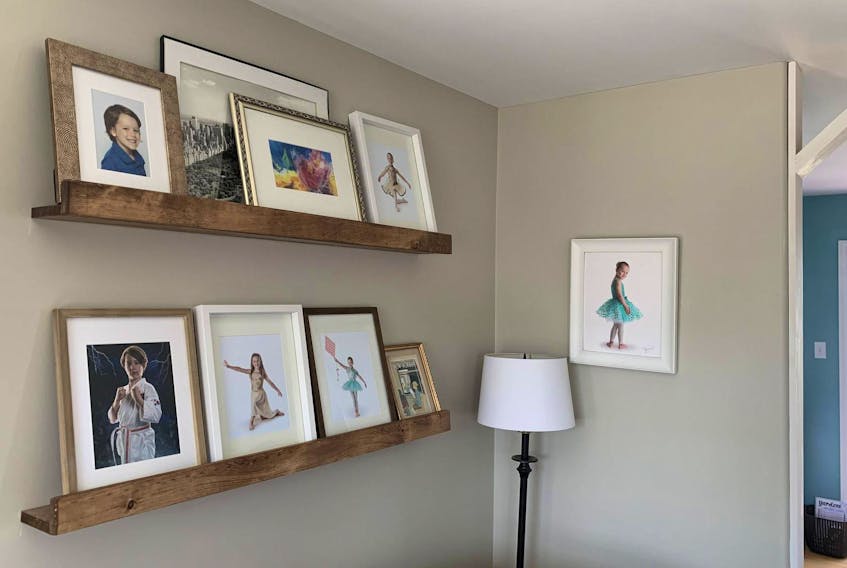
Sometimes you can’t see a project’s flaws until it’s too late, and there’s nothing left to do except ... start over again.
That was the case with our living room photo ledges. I’d decided, three years ago, to take down our floating shelves and replace them with wooden photo ledges. I loved the idea of swapping out frames whenever I felt like it — without making dozens of holes in the walls.
When I built our first set of photo ledges, I used skinny 1x2 and tiny L-brackets so the cost was just $15 for two ledges. They looked pretty good, but I didn’t think about the fact that skinny ledges wouldn’t give the frames much room to lean back against the wall. They were almost standing straight up, teetering precariously behind the small front edge.

Coupled with the fact that our living room gets very strong cross-breezes, this meant photo frames would suddenly pitch themselves off the ledges and smash on the hardwood floor. I’d lean the frames back up — minus the shattered glass — and we’d forget about the problem until the next sharp breeze sent another one tumbling down onto the couch.
So when my Handy Husband asked me what I wanted for my birthday a few weeks ago, I knew exactly what he could give me: new 8x10 frames and for him to build me thicker photo ledges that would let the frames to really LEAN.
“There were actually three things I didn’t like about the original ledges,” I told him before he headed to the home improvement store to buy the supplies. “They were too thin, I think I’d like the new ones to be stained rather than painted white, and I didn’t like the way you could see the screws on the fronts of the old ones.”
I’m glad I said something about the visible screw heads, because my Handy Husband reluctantly bought a bunch of tiny corner braces so he’d be able to connect the vertical piece and horizontal piece of each ledge in a way that would be completely hidden from view.
He also bought wider boards, as requested — 1x5s for the horizontal surface of each ledge, and 1x3s for the vertical lip at the front. Once he’d cut them down to size (four feet long, just like our previous ledges), he used three tiny corner braces inside each ledge to hold the fronts in place. Hooray for no visible screw heads!

After a light coat of my current favourite stain (Minwax’s Early American) and a dash of polyurethane to seal it in, it was time to get those ledges up where they belonged!
Since these ledges were a lot wider and heavier than our old ones — and since handy husband is a stickler for things done “properly” — he used wall anchors and heavy-duty corner braces to secure each ledge to the wall.

I delighted in transferring photos from the busted, glassless frames to shiny new ones, and even added a couple of new images that had been waiting to be framed. I plan on getting another 10x13 frame to layer on the bottom ledge, since there’s a bit too much of a gap for my liking. (Handy husband admits he hung the top ledge higher than I’d wanted.)
As much as I love gallery walls in other areas of the house, I think photo ledges are the perfect solution for our living room. We can easily add our daughter’s annual dance photo each spring — without having to rejig a whole gallery wall — and it’s fun to swap out photos seasonally.
While our new photo ledges cost us about $70 (and the original ones were just $15) they’re certainly worth the extra money. Take it from me: you want your photo ledges to be wide enough that they don’t turn your family photos into flying projectiles that could smack you on the head when the breeze picks up!
Heather Laura Clarke is a crafty maker who perpetually has paint smears on her hands, sawdust in her shoes and bits of thread stuck to her leggings. She lives in Truro with her husband, son, and daughter. Follow her adventures at HeathersHandmadeLife.com.
RELATED:


